
Tour review · TOUR REVIEWS
3 Hours Wheel Throwing Basic Ceramic Class
A wheel and a chunk of clay beats a souvenir shop.
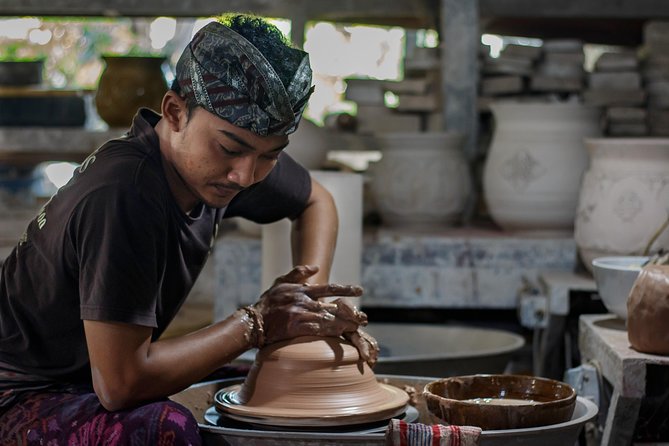
This 3 hour class in Ubud is built around learning the hands-on basics of ceramic making, right inside a working factory where you can see the tools and machinery behind daily pottery production. You get a real lesson on forming clay on the wheel, plus guidance on hand techniques to get the shape you want.
The best part is that you are not just watching. You knead, scale your clay, use the wheel throwing machine, and experiment with your own forms.
I like that the studio gives you structure but still leaves room for choice, since you work with about 3 kg of clay and can select your best pieces to take home. I also like the practical included extras: bottled water, an apron, and materials you can use to vary your colors and surface.
The one drawback to plan for is that glaze and kiln firing are not included in the base class fee. The firing and glaze process takes time, up to 4 weeks, so your final results depend on what you choose to add.
Key Highlights You Should Know Before You Go
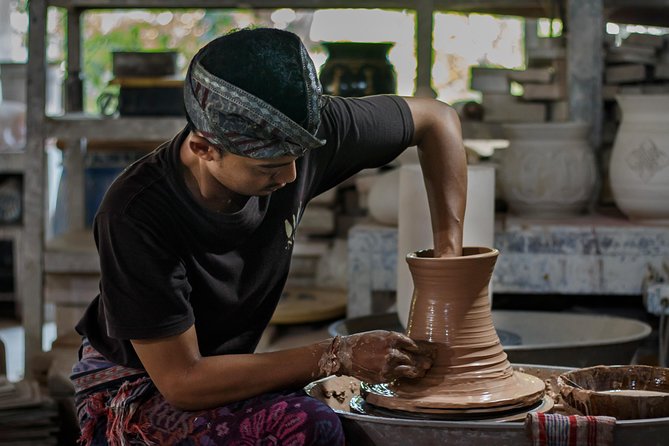
- 3 kg clay session: You experiment with a substantial amount, not a token lump.
- Wheel throwing with hand technique: The goal is real form control, not just spinning the wheel.
- Choose up to 3 best pieces: You pick what you bring home and what gets the finishing steps.
- Factory setting in Ubud: You see the tools, materials, and machinery the studio uses daily.
- Firing and glazing timing: Combustion and glaze can take 1 week to 4 weeks after class.
- Private experience: Only your group participates, so you get more attention than a crowded class.
A Ubud Wheel-Throwing Factory Session You Can Actually Use
This is the kind of pottery class that makes sense for real travel life. You only have a few hours in Ubud, and you want something you can point to later and say, I made that. The studio holds the class in its own factory, so it feels less like a demo and more like entering the workshop world.
You learn basics from the start: the clay source and ceramic type, then the physical workflow of pottery making. You’re shown the wheel throwing setup and taught how hand positioning helps the clay keep its shape as it turns. If you like learning by doing, this format fits you.
The class is also beginner friendly in spirit. The studio notes that most travelers can participate, which matches what a wheel throwing beginner needs: clear steps and hands-on time. If you’re comfortable getting a little messy, you’ll likely have a great time.
A few more Ubud tours and experiences worth a look



How the 3 kg Clay Lesson Works in Real Time
The timing matters here. The class runs about 3 hours, which is enough time to learn the sequence and make progress, but not enough time for full ceramic finishing on-site. That’s why you make, select, and then plan for later processing.
Here’s what the session is built around:
- You start with scaling and kneading your clay so it’s the right weight and workable consistency.
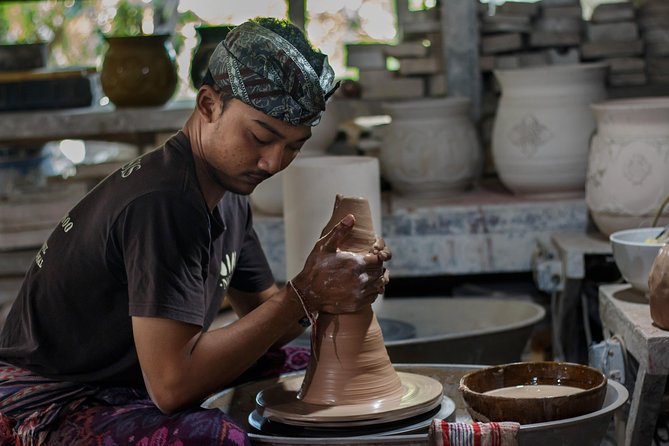
- You move on to the wheel throwing machine, using the wheel for form shaping.
- You practice hand balancing to guide the clay into the shape you want.
- You experiment and end with selections of your best outcomes.
The studio explains that you can experiment with around 2000 to 3000 grams of clay and that the materials are provided, with clay scaled up to about 3 kg for the class. The exact amount you personally use depends on how your session is structured, but the key point for you is that you have enough clay to try more than one approach.
At the end, you choose the three best creations to take home. That is a smart limit. In a short class, it keeps the learning practical and it prevents you from spending your time trying to perfect everything. You focus on what you want most, then let the finishing steps happen after.
Wheel Throwing Basics: Kneading, Centering, and Hand Balancing
Wheel throwing sounds simple until you’re standing there. Clay wants to wobble. Your hands want to rush. The studio lesson is designed to get you through the hardest part early, so you can actually make something you recognize as your own.
The process starts with kneading. Kneading is not glamorous, but it matters because it helps the clay become uniform and workable. You cannot cheat this step and still get a clean result. The class includes this stage, so you start with the right base.
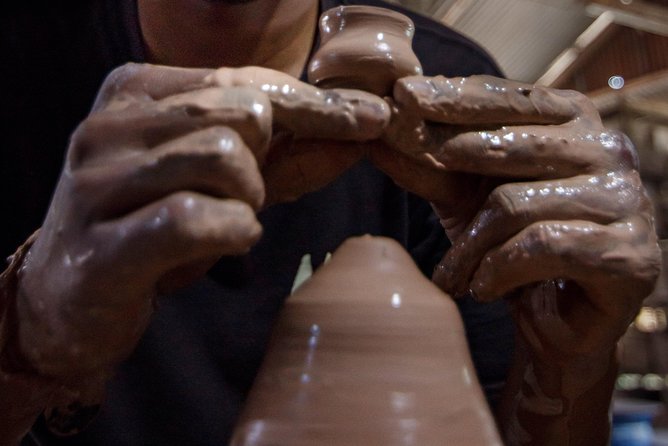
Next comes wheel forming. You’ll learn the basic knowledge of the machine and then use it with hand technique to form your piece. The studio focuses on hand balancing while the wheel shapes the clay. That’s the real skill in wheel throwing for beginners: guiding the clay with steady pressure and keeping your shape from collapsing as it spins.
One practical tip for you: keep your expectations aligned with the time. You’re learning control, not producing studio-level perfection. Your early attempts are usually more about understanding what the clay does when you press here versus there. If you leave feeling like you understand the wheel better than you did at the start, the class has done its job.
Also note the reality check from the experience format: in a first wheel throwing session, instructors may need to step in and help you keep progress moving. If you want total autonomy from minute one, this style might feel a little guided. If you want good results and fast learning, that guidance is usually exactly what you want.
Pick Your Best Three Pieces, Then Plan for Waiting on Firing
This is where you need to make a decision before you arrive, because it affects your final experience. The class teaches forming and basic ceramic workflow, but the combustion and glaze steps are separate.
What you can count on:
- You create your pieces in class.
- You choose your best three to bring home.
- If you want the finished look with full glazing and baking, the studio can help.
- The combustion and glaze process takes 1 week up to 4 weeks.
What is not included:
- Combustion for the final product is listed as not included.
This is common in ceramic classes, but it’s still worth calling out for you. Your “finished ceramics” timeline will likely be longer than your 3 hour class. So if you’re traveling and have plans right after Ubud, plan a buffer, or plan to bring a raw clay piece instead of a fully finished fired item.
A small but helpful note: one response from the provider says baking pieces fee is not included, yet they would give one piece free of charge. That sounds like a courtesy offer, but you should treat it as a “confirm when you book” item, especially if you care about the final glaze and kiln result.
Color Materials and What You Control in This Class
You can get more than one look out of the same basic shape. The class includes wheel use and includes coloring materials if you want to vary your art. That means you’re not limited to one bland outcome.
Here’s a good way to think about control in this type of class:
- You control the form you create on the wheel.
- You control surface choices during the class as allowed by the materials.
- The studio controls the firing and glazing outcome when you add those finishing steps.
If you’re the type who likes a personal touch, decide your look early. Wheel throwing gives you the structure, then your choices on color and surface make it feel like yours. Even if your first forms aren’t perfect, the decoration can make the final pieces feel intentional.
Also, bring a realistic mindset. In a short beginner class, you’re learning process and technique. If your main goal is a specific “exact replica” design, you may feel limited. If your goal is learning and taking home something you made, you’re in the right place.
A few more Ubud tours and experiences worth a look

Price and Value: What $50 Covers and What Comes Later
At $50 per person for about 3 hours, this is priced like a real activity, not a long tour with bus rides and multiple stops. Value comes from the fact that you’re doing the work yourself: you knead and shape clay on a wheel, you get a factory backdrop, and you take home up to three of your best creations.
But the most important value detail is also the simplest: the class fee covers the learning and materials for making, not the final firing step. Combustion for final products is not included, and the studio explains glaze and firing can take 1 week to 4 weeks afterward.
So how should you judge value?
- If you only want to learn and make, $50 can feel like a fair deal.
- If you want fully finished, glazed, baked ceramics, you should expect extra costs after class, because firing is its own process.
The upside is that you get to choose. You’re not forced into the expensive finishing step at the beginning. You can make your pieces, see what you like, then decide what to send for the full finish.
For timing, the class is booked on average about 53 days in advance, which is a hint that sessions fill. If pottery is a “must do” on your Bali trip, booking ahead helps you lock in the day you want.
Getting to Jl. Nakula No.511 and Making the 3 Hours Count
The meeting point is on Jl. Nakula No.511, Guwang, Kec. Sukawati, Kabupaten Gianyar, Bali 80582, Indonesia, and the class ends back there. Transportation is not included, and lunch and snacks are not included either.
That matters because you’ll likely want to schedule this as a standalone block in your day. Build in extra time to get there, park, and settle. A wheel throwing class is hands-on and time sensitive. If you arrive late, you may lose the part where you learn the sequence that makes your later shaping easier.
A simple on-the-ground strategy:
- Eat something beforehand, since lunch is not provided.
- Bring a way to get back if you don’t arrange transport ahead.
- Wear clothes you don’t mind getting splashed, even with an apron.
One more practical thought based on the communication reality of small local activities: if you’re using a third-party booking, confirm details early and keep your own notes. Slow messaging happens to local vendors sometimes, so it’s safer if you verify the meeting point directions in advance rather than hoping.
Who This Class Is For in Ubud
This is a great match if:
- You want a hands-on activity with a tangible result.
- You’re a beginner and want a guided introduction to wheel throwing.
- You like learning craft process, not just taking photos.
It may be less perfect if:
- You need everything finished on the same day.
- You want zero guidance and you prefer to figure every step out alone.
- You don’t want any waiting time after the class for combustion and glaze.
Because only your group participates, it can be a good choice for couples or friends who want focused attention. It’s also a solid option if you’re traveling with a small group and you want everyone to do the same activity together.
Should You Book This Ubud Wheel Throwing Class?
If your goal is to learn wheel throwing basics and leave with pieces you shaped, I think this class is worth booking. The clay amount, the wheel time, and the factory setting all support a real learning experience. The included apron and water are helpful, and the “make and select up to three best pieces” approach keeps the class practical.
Just go in with two expectations set:
- Firing and glazing cost extra, and combustion for final products is not included.
- Your finished look depends on a 1 week to 4 week processing window.
If that timing works for your trip, book it. If you need same-day finished ceramics, you might want to choose a different option that includes kiln work in the price.
FAQ
How long is the 3 Hours Wheel Throwing Basic Ceramic Class?
The class lasts about 3 hours.
Where does the class start in Ubud?
The meeting point is at Jl. Nakula No.511, Guwang, Kec. Sukawati, Kabupaten Gianyar, Bali 80582, Indonesia.
What is included in the price?
Materials are provided for the session, including clay scaled for the class, wheel throwing machine usage, and bottled water. An apron is also provided, and coloring materials are available if you want to vary your art.
Do I get to take home what I make?
Yes. You can bring home your creation, with a limit of three best pieces selected.
Is glaze and baking included?
Combustion and glaze processing for the final product is not included in the class price. The studio can help, and it takes 1 week up to 4 weeks.
Is transportation, lunch, or snacks included?
No. Private transportation, lunch, and snacks are not included.
Is this a private class?
Yes. Only your group participates.
What happens if the weather is bad?
This experience requires good weather. If it is canceled due to poor weather, you will be offered a different date or a full refund.
More 3-Hour Experiences in Ubud
More Workshops & Classes in Ubud


More Tour Reviews in Ubud






Not for you? Here's more nearby things to do in Ubud we have reviewed












Tour Reviews, compared.
 ★ 5.0All-Inclusive Ubud Private TourFrom $10014,344 reviews
 ★ 5.0Best of Ubud Full-Day Tour with Jungle SwingFrom $568,571 reviews
 ★ 5.0Monkey Forest, Jungle Swing, Rice Terrace, and Water TempleFrom $317,160 reviews
 ★ 5.0Best of Ubud 1-Day Private TourFrom $544,451 reviews
 ★ 4.4Bali: Ubud Palace Legong Dance Show TicketFrom $63,979 reviews
 ★ 5.0Uluwatu Sunset, Kecak Dance, and Dinner Jimbaran BeachFrom $353,681 reviews
 ★ 5.0Tanah Lot and North Bali Tour: Scenic JourneyFrom $1003,620 reviews
 ★ 5.0Body Massage Experience in Ubud Traditional SpaFrom $213,506 reviews
Browse the lists this tour appears in